Zabbix is used in everything from Network Operations Center (NOC) to companies of all sizes to monitor their infrastructure. Frequently, Zabbix is used on wall-mounted monitors to show real-time data. This does however require some sort of dedicated hardware to drive these monitors. This is often one or multiple desktop PCs or similar.
These PCs are both expensive to purchase and to maintain. With Screenly, all you need is a single Raspberry Pi per screen. We handle everything for the device, from software to security updates, so you can concentrate on more important tasks.
Getting your Zabbix dashboard URL
To display your Zabbix dashboards on a digital sign with Screenly, you’ll need the URL to the dashboard you would like to display. To get this URL, log in to your Zabbix front-end and click on “Dashboards” from the left side-menu and open the dashboard you would like to display on your digital sign.
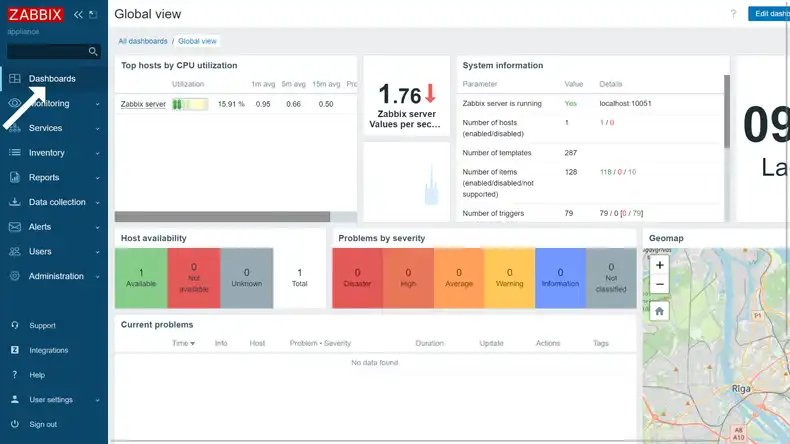
After opening the dashboard you would like to display, copy the dashboard URL from your browser’s address bar, then log out of your Zabbix frontend.
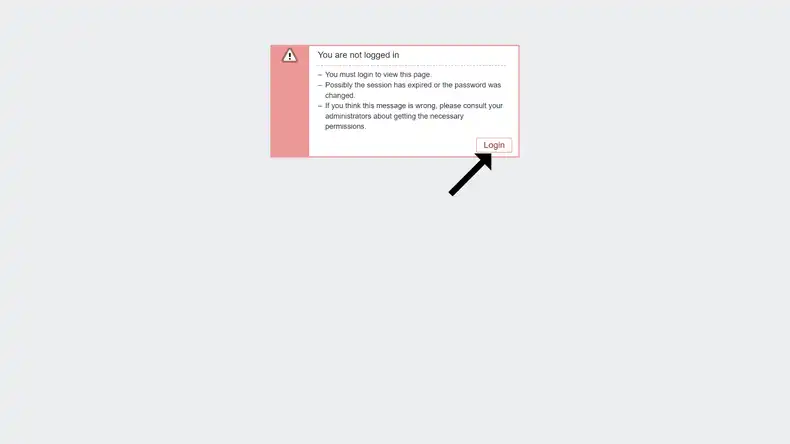
Now, proceed to open a new browser window, paste the dashboard URL you copied into your browser’s address bar and press the “Enter” key on your keyboard. You should see a pop-up message as seen in the screenshot below. Click on the “Login” button on your screen.
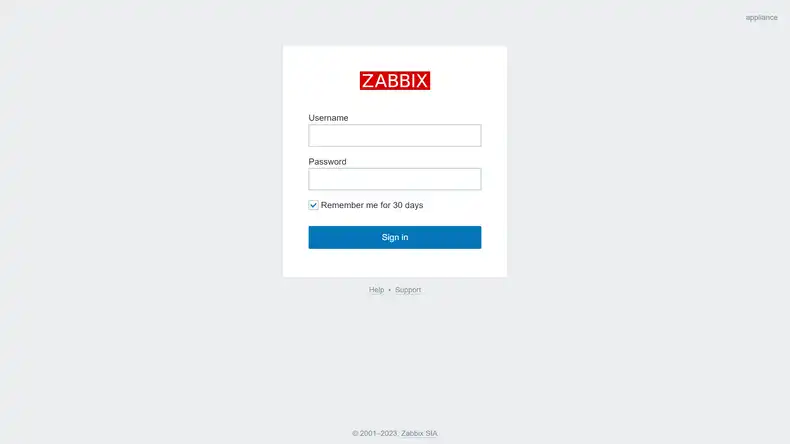
After clicking on the “Login” button from the pop-up message, you should see a traditional login form with “Username” and “Password” input fields as seen in the screenshot below. Now proceed to copy the URL in your browser’s address bar and store it somewhere, as this is what you’ll use to add the Zabbix dashboard as content to your Screenly account.
Adding your Zabbix dashboards to Screenly
To set up your digital sign with Screenly, first purchase a digital signage player. A digital signage player is a small physical device that renders content to your TV or monitor - Screenly offers the Screenly Player and Screenly Player Max. You can then pair your digital signage player and associated screen to your online Screenly account.
The next step is to log in to your Screenly account here. If you do not have a Screenly account, register for a 14-day free trial.
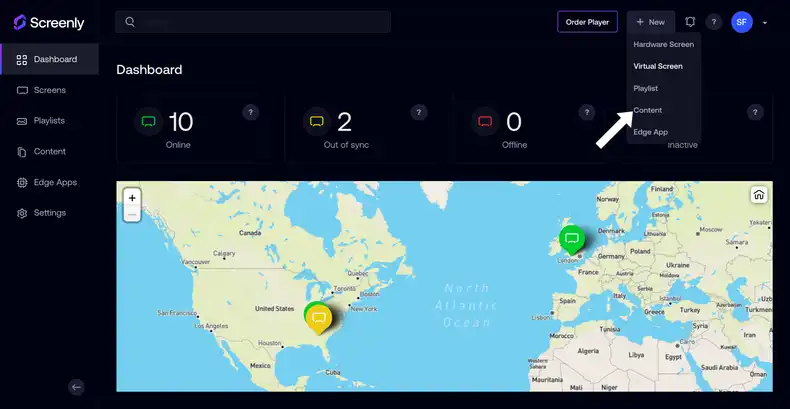
After logging in to your Screenly account, click on the “New” button on the top right of your screen. Then, click on the “Content” tab in the dropdown menu.
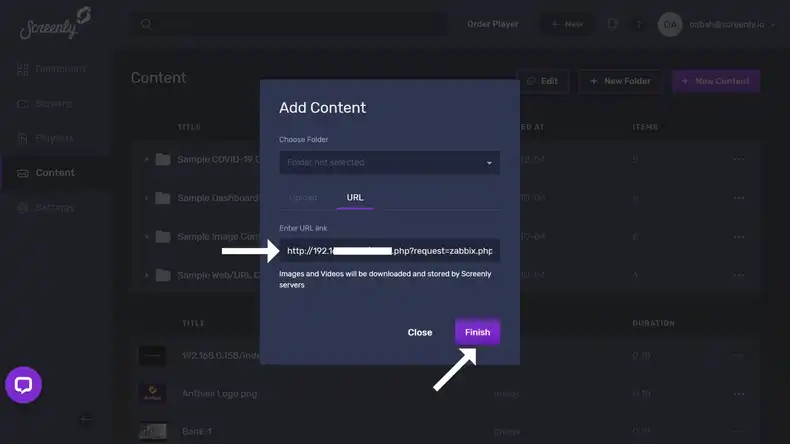
Next, click the URL tab in the popup modal and paste the Zabbix dashboard URL into the “Enter URL link” input field. Be sure to click “Finish” on the bottom right after you successfully add the URL.
Edit the Zabbix content title by clicking on the input field below the “Title” on your screen. Be sure to click the “Save” button on the bottom right.
In this case, I’ve named the Zabbix content as “Zabbix dashboard” for easy identification. You can find the Asset ID for the Zabbix content at the end of the URL in your browser’s address bar. Copy and store this Asset ID for later.
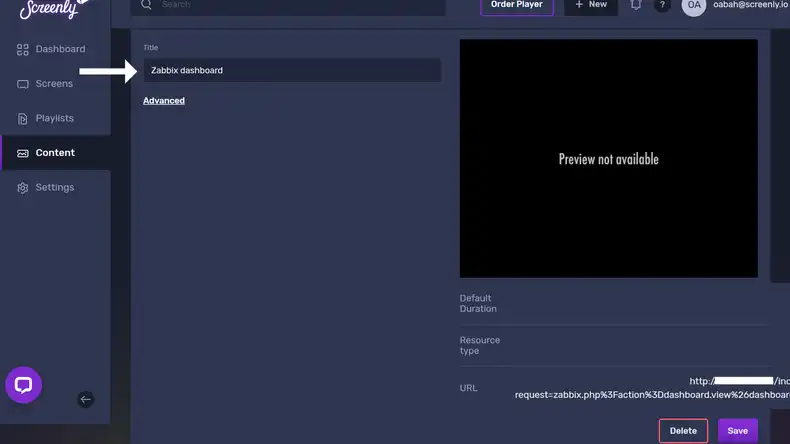
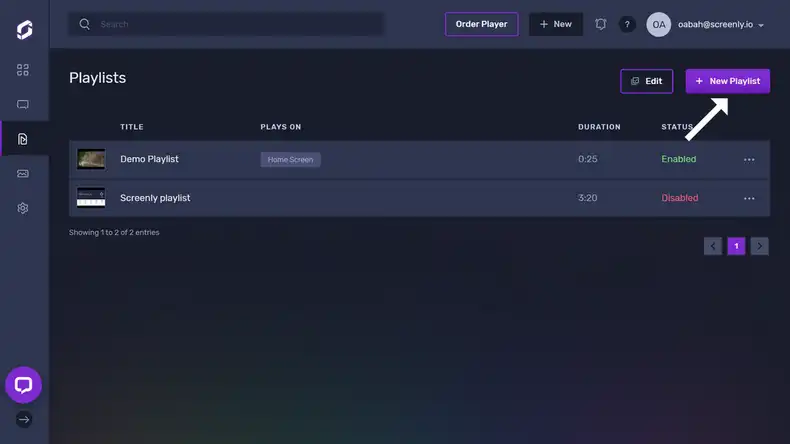
With the above steps completed, you can now add this asset to a playlist. To add your content to a playlist, click the “Playlist” tab from the left-hand menu. Create a new playlist by clicking the “+ New Playlist” button on the top right of the new screen that loads. To edit a playlist, click on its name from the list of playlists.
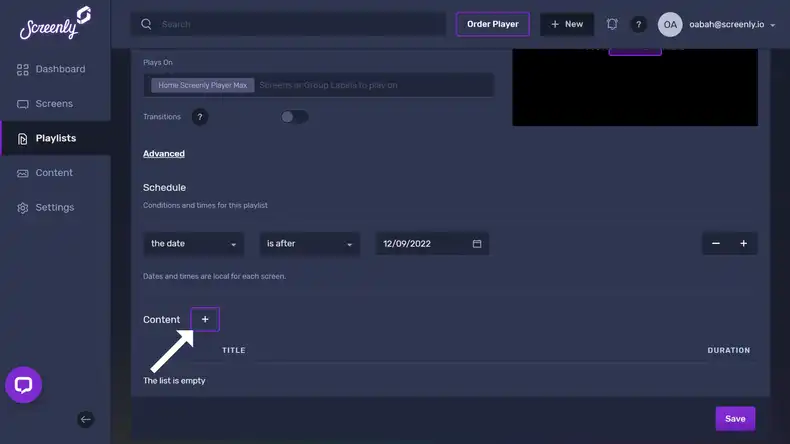
Within the playlist, click the “+” icon in the Content section. From there, you will see a popup that will allow you to add the Zabbix dashboard URL to the playlist from your content collection.
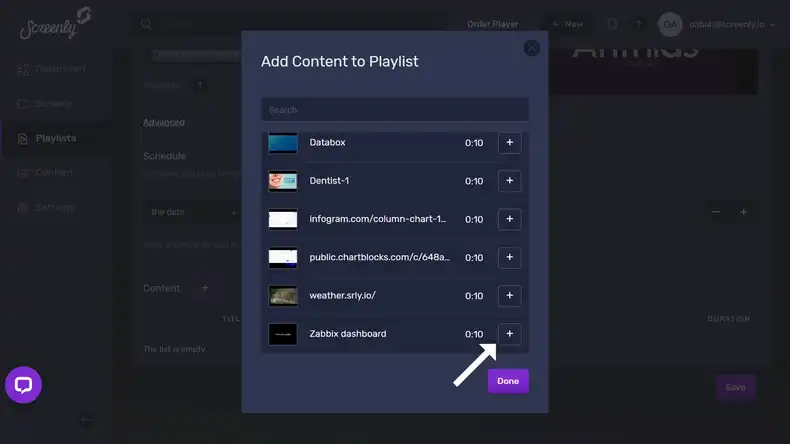
In the new “Add Content to Playlist” popup, find your Zabbix dashboard content and click the “+” button next to the file. Then, click the “Done” button below.
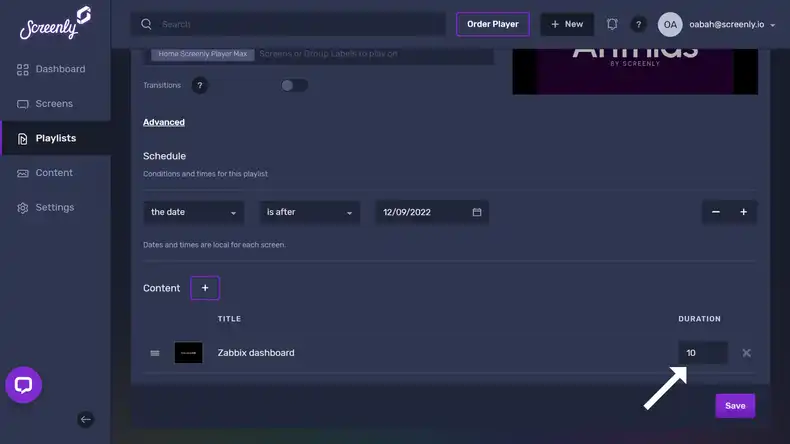
You will then see your Zabbix dashboard in the playlist’s content section. Next to the dashboard content listing, change the listing’s duration to the amount of time you want the dashboard to display on your screen. Be sure to click “Save” on the bottom right.
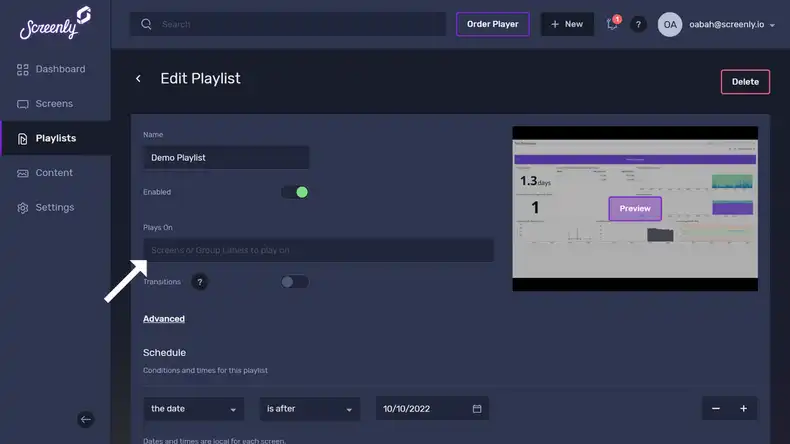
To assign the playlist containing the Zabbix dashboard content to a screen, click on the “Plays On” input field in the “Edit Playlist” section.
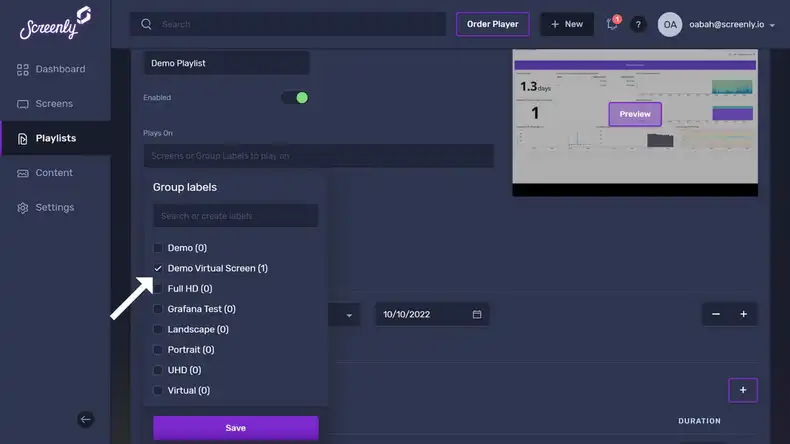
A dropdown menu will appear containing all your screens and group labels. Select the screen(s) or group(s) of screens you would like the playlist to show on. Make sure to click “Save” at the bottom of the dropdown after selecting the screen(s) or group(s) of screens you want.
Once you assign the playlist containing the Zabbix dashboard content to your screen(s) or group(s) of screens, you will see the Zabbix login form on your TV or monitor in just minutes.
Zabbix dashboard authentication on your digital sign
Now that you’ve added your Zabbix content URL to your Screenly account, we can tackle the next piece: authentication. Zabbix blocks computers from accessing a user’s dashboard via URL without logging in, so Screenly has made it easy by creating a ready-to-use Javascript snippet on the Screenly playground. Modifying this script with your Zabbix username and password allows you to log in to your Zabbix front-end and view your dashboard on a digital sign, using Screenly’s Javascript Injection feature.
The recommended way to work with our JavaScript Injector is to use Screenly’s Command Line Interface. Visit our CLI repository for more information on how to work with the CLI.
You’ll need the Asset ID for the Zabbix content which you should have gotten after adding the Zabbix content to your Screenly account earlier in this article. If you don’t have the asset ID, open the Zabbix content page in your Screenly account user interface. You can find the Asset ID at the end of the added URL in your browser’s address bar. Store the Asset ID in your CLI by running the following command.
$ export ASSET_ID=XXXXXXXXXXXXXXXXXXXXXXXXXX
XXXXXXXXXXXXXXXXXXXXXXXXXX
With our asset ID stored, we can now apply the JavaScript Injection for Zabbix authentication. Proceed to download zabbix-login-via-credentials.js from Screenly’s playground and modify it with your credentials. Run the following command to add the JavaScript to the Zabbix dashboard.
$ screenly asset inject-js "$ASSET_ID" /path/to/script.js
20XX-XX-XXTXX:XX:XX.XXXZ INFO  [screenly] Asset updated successfully.
After running the above command, your Zabbix dashboard should display correctly on your screen instead of the Zabbix login page.
We are here to help
For more information on how to make use of our CLI, visit the repository for our CLI on github. To learn more about our javascript injector feature, you can also visit Screenly’s playground on github. If you have any trouble integrating Shopify with Screenly, let us know at Screenly Support. We are here to help!

