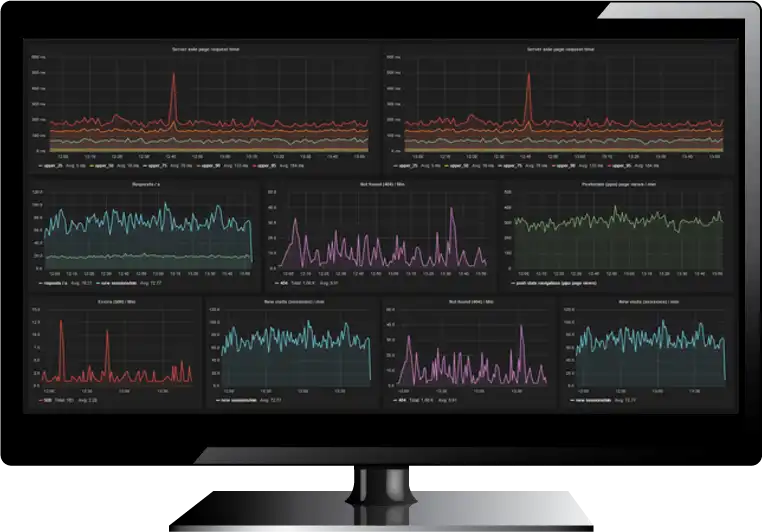
HostedGraphite is an excellent service for graphing and visualizing all sorts of data. As the name implies, HostedGraphite offers a hosted Graphite solution. HostedGraphite collects data in your preferred programming language, and the HostedGraphite team built the software so users can automate their data collection entirely via API.
Once you have HostedGraphite collecting your data, you can set alerts for unexpected data trends and drops in data collection. You can receive these alerts on popular communication tools, including PageDuty, HipChat, Slack, and email.
HostedGraphite also makes sharing data with your team and partners easy via a suite of team management features, including support for Single Sign On (SSO) functionality with SAML. As a customer, you also get access to Grafana, Statsd, Tasseo and other powerful tools. Whether you’re trying to plot business metrics, performance metrics, or system stats, HostedGraphite is a great tool to have in your toolkit.
How to use HostedGraphite with Screenly
As with all data dashboards, a dashboard can only benefit a team if team members regularly view and discuss the dashboard data. Data dashboards and digital displays are a natural pair, as a digital display allows team members to view company data easily throughout the day.
Once you start pushing data to HostedGraphite, you need to create a dashboard to view and make sense of this data. Our preferred dashboard tool when working with HostedGraphite is Grafana, as Grafana looks a lot better than Graphite. Simply follow our Grafana dashboard guide to create a real-time dashboard from your data on HostedGraphite.
With your dashboard(s) created, you need to add them to Screenly. To do this, you need to follow the steps outlined below.
First, you’ll need to log in to your HostedGraphite account.
From the left-hand side menu within your HostedGraphite account, click on “Dashboards” to open your HostedGraphite dashboards in Grafana.
In the Grafana interface, before you locate the dashboard you’d like to display, you’ll need to generate an API key. This is what Screenly uses to authenticate against Grafana. This API key can be used across multiple screens.
To generate an API key in Grafana, you need to have administrative permissions. Assuming you do have that, take the following steps:
In the left-hand menu, hover over the “gear” icon, and select “API Keys” from the sub menu.
Click on “Add API Key”. Then enter a name for your API Key and select “Viewer” as the role and press “Add”.
You will then get a dialogue window with a command that looks like this:
curl -H "Authorization: Bearer abc123=" https://grafana.yourdomain.com/api/dashboards/home
What you need to take note of here is “Authorization: Bearer abc123=”. You will use this in Screenly when you are adding your assets.
Now, you can proceed to navigate to the dashboard you’d like to display, open the dashboard and click on the share icon at the top, then copy the generated URL.
We recommend that you append “&kiosk” to the end of the URL. This will automatically hide the menu bars, which makes for a better viewing experience.
With the URL ready, simply add this as an asset to Screenly with the following steps:
Log in to your Screenly account here.
After logging in to your Screenly account, click on “New”, then click on “Content” from the dropdown menu.
In the popup modal, switch to the URL tab, then paste the HostedGraphite dashboard share URL you copied earlier in the space provided. You can select a folder that you would like to save this content. Make sure to click “Finish” when done. The HostedGraphite Dashboard is now saved as content in your Screenly account.
Once you’ve added the asset, you need to add the credentials so that the device can actually access it. To do this, take the following steps:
Navigate to the asset you just added. Select “Advanced” and click on “Add Header”.
In the “Header” field, enter “Authorization”. In the “Value” field, enter the “Bearer abc123=” (replace this with your token). Then scroll down and click on “Save” at the bottom right corner.
With the above steps completed, you can now add this asset to a playlist. To add your content to a playlist, click the “Playlist” tab from the left-hand menu. If you wish to add a new playlist, click the “+ New Playlist” button on the top right of the new screen that loads. To edit the new playlist or a previously existing playlist, click on the name of the playlist you wish to edit from the list of playlists.
Within the playlist, click the “+” icon in the Content section. From there, you will see a popup that will allow you to add the HostedGraphite dashboard to the playlist from your content collection.
In the new “Add Content to Playlist” popup, find your HostedGraphite dashboard content and click the “+” button next to the file. Then, click the “Done” button below.
You will then see your HostedGraphite Dashboard in the playlist’s content section. Next to the dashboard content listing, change the listing’s duration to the time you want the dashboard display on your screen. Be sure to click “Save” on the bottom right.
To assign the playlist containing the HostedGraphite dashboard content to a screen, click on the “Plays On” input field in the “Edit Playlist” section.
A dropdown menu will appear containing all your screens and group labels, select the screen(s) or group(s) of screens you would like the playlist to show on. Make sure to click “Save” at the bottom of the dropdown after selecting the screen(s) or group(s) of screens you want.
Once you assign the playlist containing the HostedGraphite dashboard content to your screen(s) or group(s) of screens, your HostedGraphite Dashboard will display on your TV or monitor in just minutes.
Tips for using HostedGraphite/Grafana with Screenly
- Use dedicated dashboards for Screenly.
- Since most Screenly digital signs use a resolution of 1920x1080px, you should optimize your dashboards for this resolution. Please note that Screenly is also able to support 4K resolution.
- A good rule of thumb for your dashboard size is three rows that are each 300px tall. Dashboards of this size will typically fit well on Screenly-powered digital displays.
- You can create multiple dashboards, such as one for marketing and one for sales performance. You do not need to have every metric for your company compacted into one screen.
Get started
Are you ready to give Screenly a go? Sign up for Screenly.


